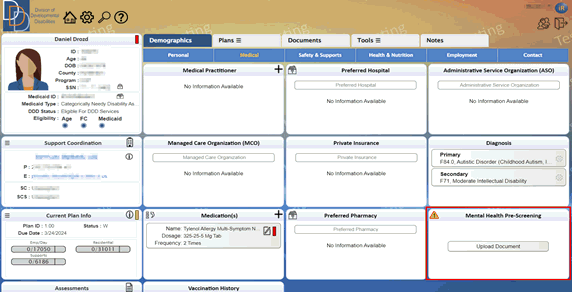
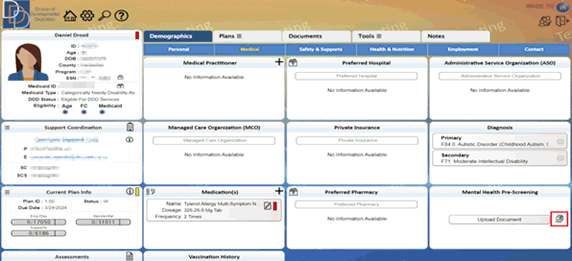
A Mental Health Pre-Screening Checklist is required to be completed prior to an individual receiving services. The new Mental Health Pre-Screening tile is introduced to iRecord to manage the required document directly on the Medical screen.
The Support Coordinator ensures completion of the form prior to uploading the document to iRecord.
Refer to User Privileges for role permissions to upload and/or view a document.
● Mental Health Pre-Screening tile appears on the Medical tab.

● Mental Health Pre-Screening Document must be uploaded before approving a plan.
● An incomplete
Mental Health Pre-Screening shows
a yellow status indicator on the Plan
Action tile with the fooling tooltip message:
No Mental Health Pre-Screening checklist
Available
● Mental Health Pre-Screening displays
 to inform you that document has
not been uploaded for the participant. Hover over
  displays
information required to create plan.
● During
an update to Mental Health Pre-Screening
details and before Upload, any
click outside the pop-up interface displays a confirmation, as shown in
the following figure. Click  to
confirm or click
  (top
right corner) to cancel.

● View the following controls on Mental Health Pre-Screening.
Control |
Description |
Upload Document |
Click Upload Document button to view the Upload Mental Health Pre-Screening pop-up that displays additional controls to upload a document. |
|
It does not display without an existing
Mental health Pre-Screening
document. View |
1. On the Mental Health Pre-Screening tile, click Upload Document.
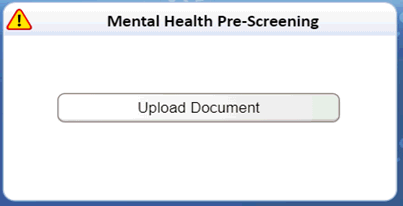
2. The Mental Health Pre-Screening Checklist pop-up controls appear, as shown in the following figure.
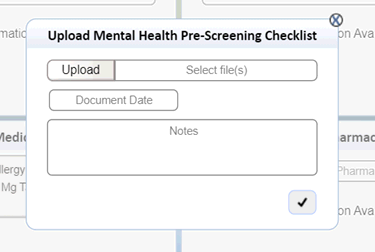
3. Enter the details within each field of Mental Health Pre-Screening Checklist. For more information, refer to the following table.
Field |
Description |
Document Date |
Enter the date of document completion within the text box. or Select the date of document completion using the calendar controls, shown below.
Click the arrows to navigate to the previous or next month or use the drop-downs to select the appropriate month of a year. The calendar controls are disabled for future dates. For future dates entered, iRecord displays an error message (during upload). Mandatory/Optional: Mandatory Date format: MM/DD/YYYY |
Select file(s) |
Click Select file(s) and a dialog box appears that provides you the controls to browse and then select the document. It is mandatory for the selected form to have one of the following file extensions: • DOC • DOCX • TXT • TIF • JPG • JPEG • PNG • GIF iRecord does not permit you to upload a file and displays an error message (during upload) with any of the following conditions: • Incompatible file extension (see aforementioned extensions) • File size exceeds 4 MB • File name exceeds 150 characters Mandatory/Optional: Mandatory |
Notes |
Enter notes pertaining to the document that may be relevant or needs to be recorded. Mandatory/Optional: Optional Maximum limit: 1000 characters |
4. Click
 to upload the
document and close the Mental Health
Pre-Screening Checklist document pop-up. iRecord
refreshes the Medical tab with
an updated Mental Health Pre-Screening
tile, as shown in the following figure. (Click
  to
view the uploaded document.)
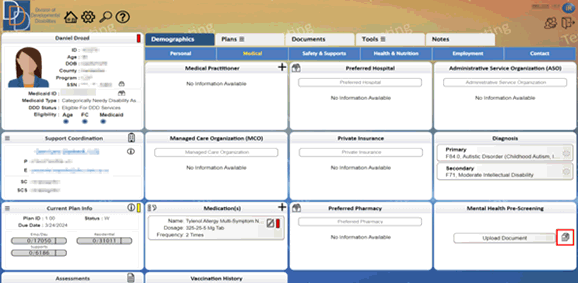
Note: The  icon clears once you upload a document.
You can click Upload Document
button and upload a new document or replace the existing document to be
shown on the Mental Health Pre-Screening
tile.
● On the
Mental Health Pre-Screening tile,
click  to view the most recently uploaded document.
Note: The file downloads to your browser’s default folder. Select the file from the downloaded folder to view the form.
1. On the Documents screen, use the Filter feature to locate the document(s).
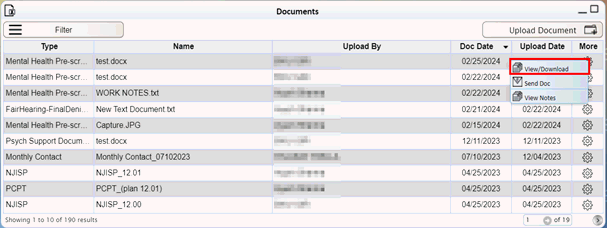
2. To view a document, you have one of the following two options:
• Click the line item.
• Click
![]() and
the click View/Download to view
or download the document, as shown in the following figure.
and
the click View/Download to view
or download the document, as shown in the following figure.
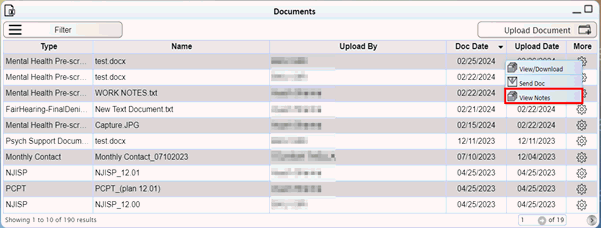
3. To view
the notes associated with a document, click ![]() and
then click View Notes.
and
then click View Notes.
4. iRecord displays the entered notes and other details recorded during upload of the document.
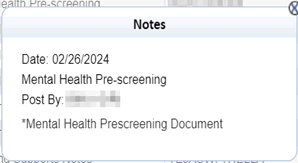
Note: On the Notes screen, the Mental Health Pre-Screening note category has been added to enable you to filter the notes recorded during the upload of a document.
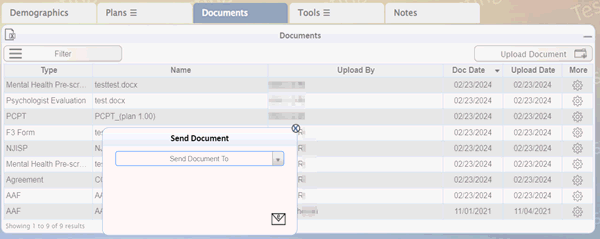
1. Click
![]() on
the appropriate document and click Send
Doc and iRecord displays
the Send Document pop-up tile,
as shown in the following figure.
on
the appropriate document and click Send
Doc and iRecord displays
the Send Document pop-up tile,
as shown in the following figure.
2. Click Send Document To and view the list of available options.
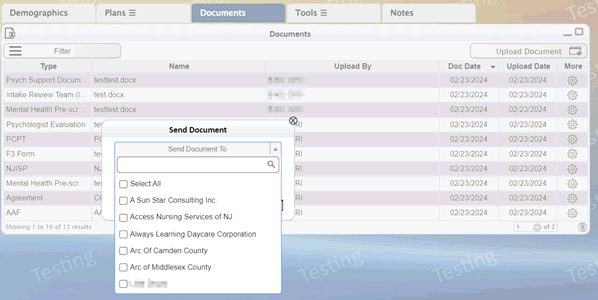
3. Click
check box(es) and then click ![]() .
.
4. View a confirmation message, as shown in the following figure.
